#1-Back Braces and The Radius
The Back Braces and The Radius | Time to cut, glue, and shape the back braces. The back braces add strength and form to the back and also create a dome to reflect the sound from the top/soundboard outward. Both the back and the top of the guitar will be domed. These domes are created by radiusing the braces. And that is where the tricky part comes in.
Radiusing the guitar top and back means shaping them as if they were part of a sphere so that they take on a domed shape. This is much easier to visualize than explain. In the following graphic imagine that the circle is just a cross section of a very large sphere. In this case, a sphere that has a 15 foot radius (distance from the center to the outer edge).
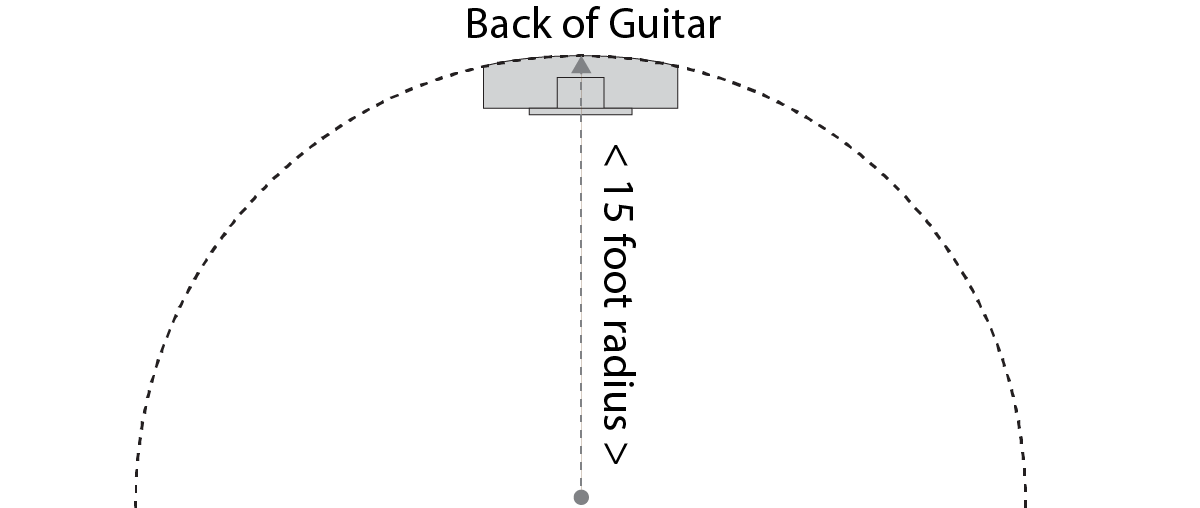
radius-explained
The easiest way to make this is with a radius dish which is a piece of MDF with a spherical hollow carved out of one side and 80 grit sandpaper attached to that concave face. Below is a picture of my 15 foot dish and you can see the spherical surface with a straight edge laid over the top revealing the different level gaps:

img_1469-copygapradius
There are methods for making your own radius dishes relatively cheaply with a lot of math, a lot of jig building, and a lot of dust. I decided to reserve some of my "tool money" and just buy these. I have a 15 ft radius dish for the back and a 30 ft radius dish for the top.
The dome shape is formed in the back primarily by the shaping of the braces. Once the braces were cut to their rough dimensions, I sanded them in the radius dish in their approximate locations:

img_1432
This sanding cuts the appropriate arc into the back of the braces. Once they were rough shaped, I placed the radius dish in my GoBar deck with my back plate on top of the radius dish and glued the braces in place.

img_1440
After cleaning out any glue squeeze out and letting it sit for about an hour it was time to shape the braces. Using my block plane and chisel I removed material from each of the braces one at a time, tapping the back and listening to its tone and "tightness." Since I really have no experience here, I simply worked things until the back sounded "musical."

img_1441
Once the braces were shaved down, I finished them off by sanding everything down with 180 grit paper making it all nice and smooth with a parabolic shape. The very ends of the braces are shaved down because they will actually be glued through the sides of the guitar for added strength and energy transference.

img_1444bracemoney
At this point I really have no idea what I am doing. I am just following the advice of others. Since the back braces are not as critical to tone as the top braces, I did not sweat this one too much.