#1-Fitting the Back
Fitting the Back | I realized that I am a little behind on posting up my progress. This weekend I actually "closed the box" so that I have a guitar body. However, I have not touched on a couple of steps that led up to that monumental accomplishment so I will play catch up on that now.

In order to glue the back to the sides, I decided to follow a method where the back braces are actually notched through the sides of the guitar. This is more work, but I thought this first go around, I would do everything the hard way. To do this, I put the sides in the mold, clamped the back in place and marked that places where the back braces would go through the kerfing and the sides. Then using a Dremel tool and my chisels, I very carefully notched out the sides.

back fitting IMG_1462
Once everything was fitted properly, the back is glued up and everything goes in the GoBar deck:
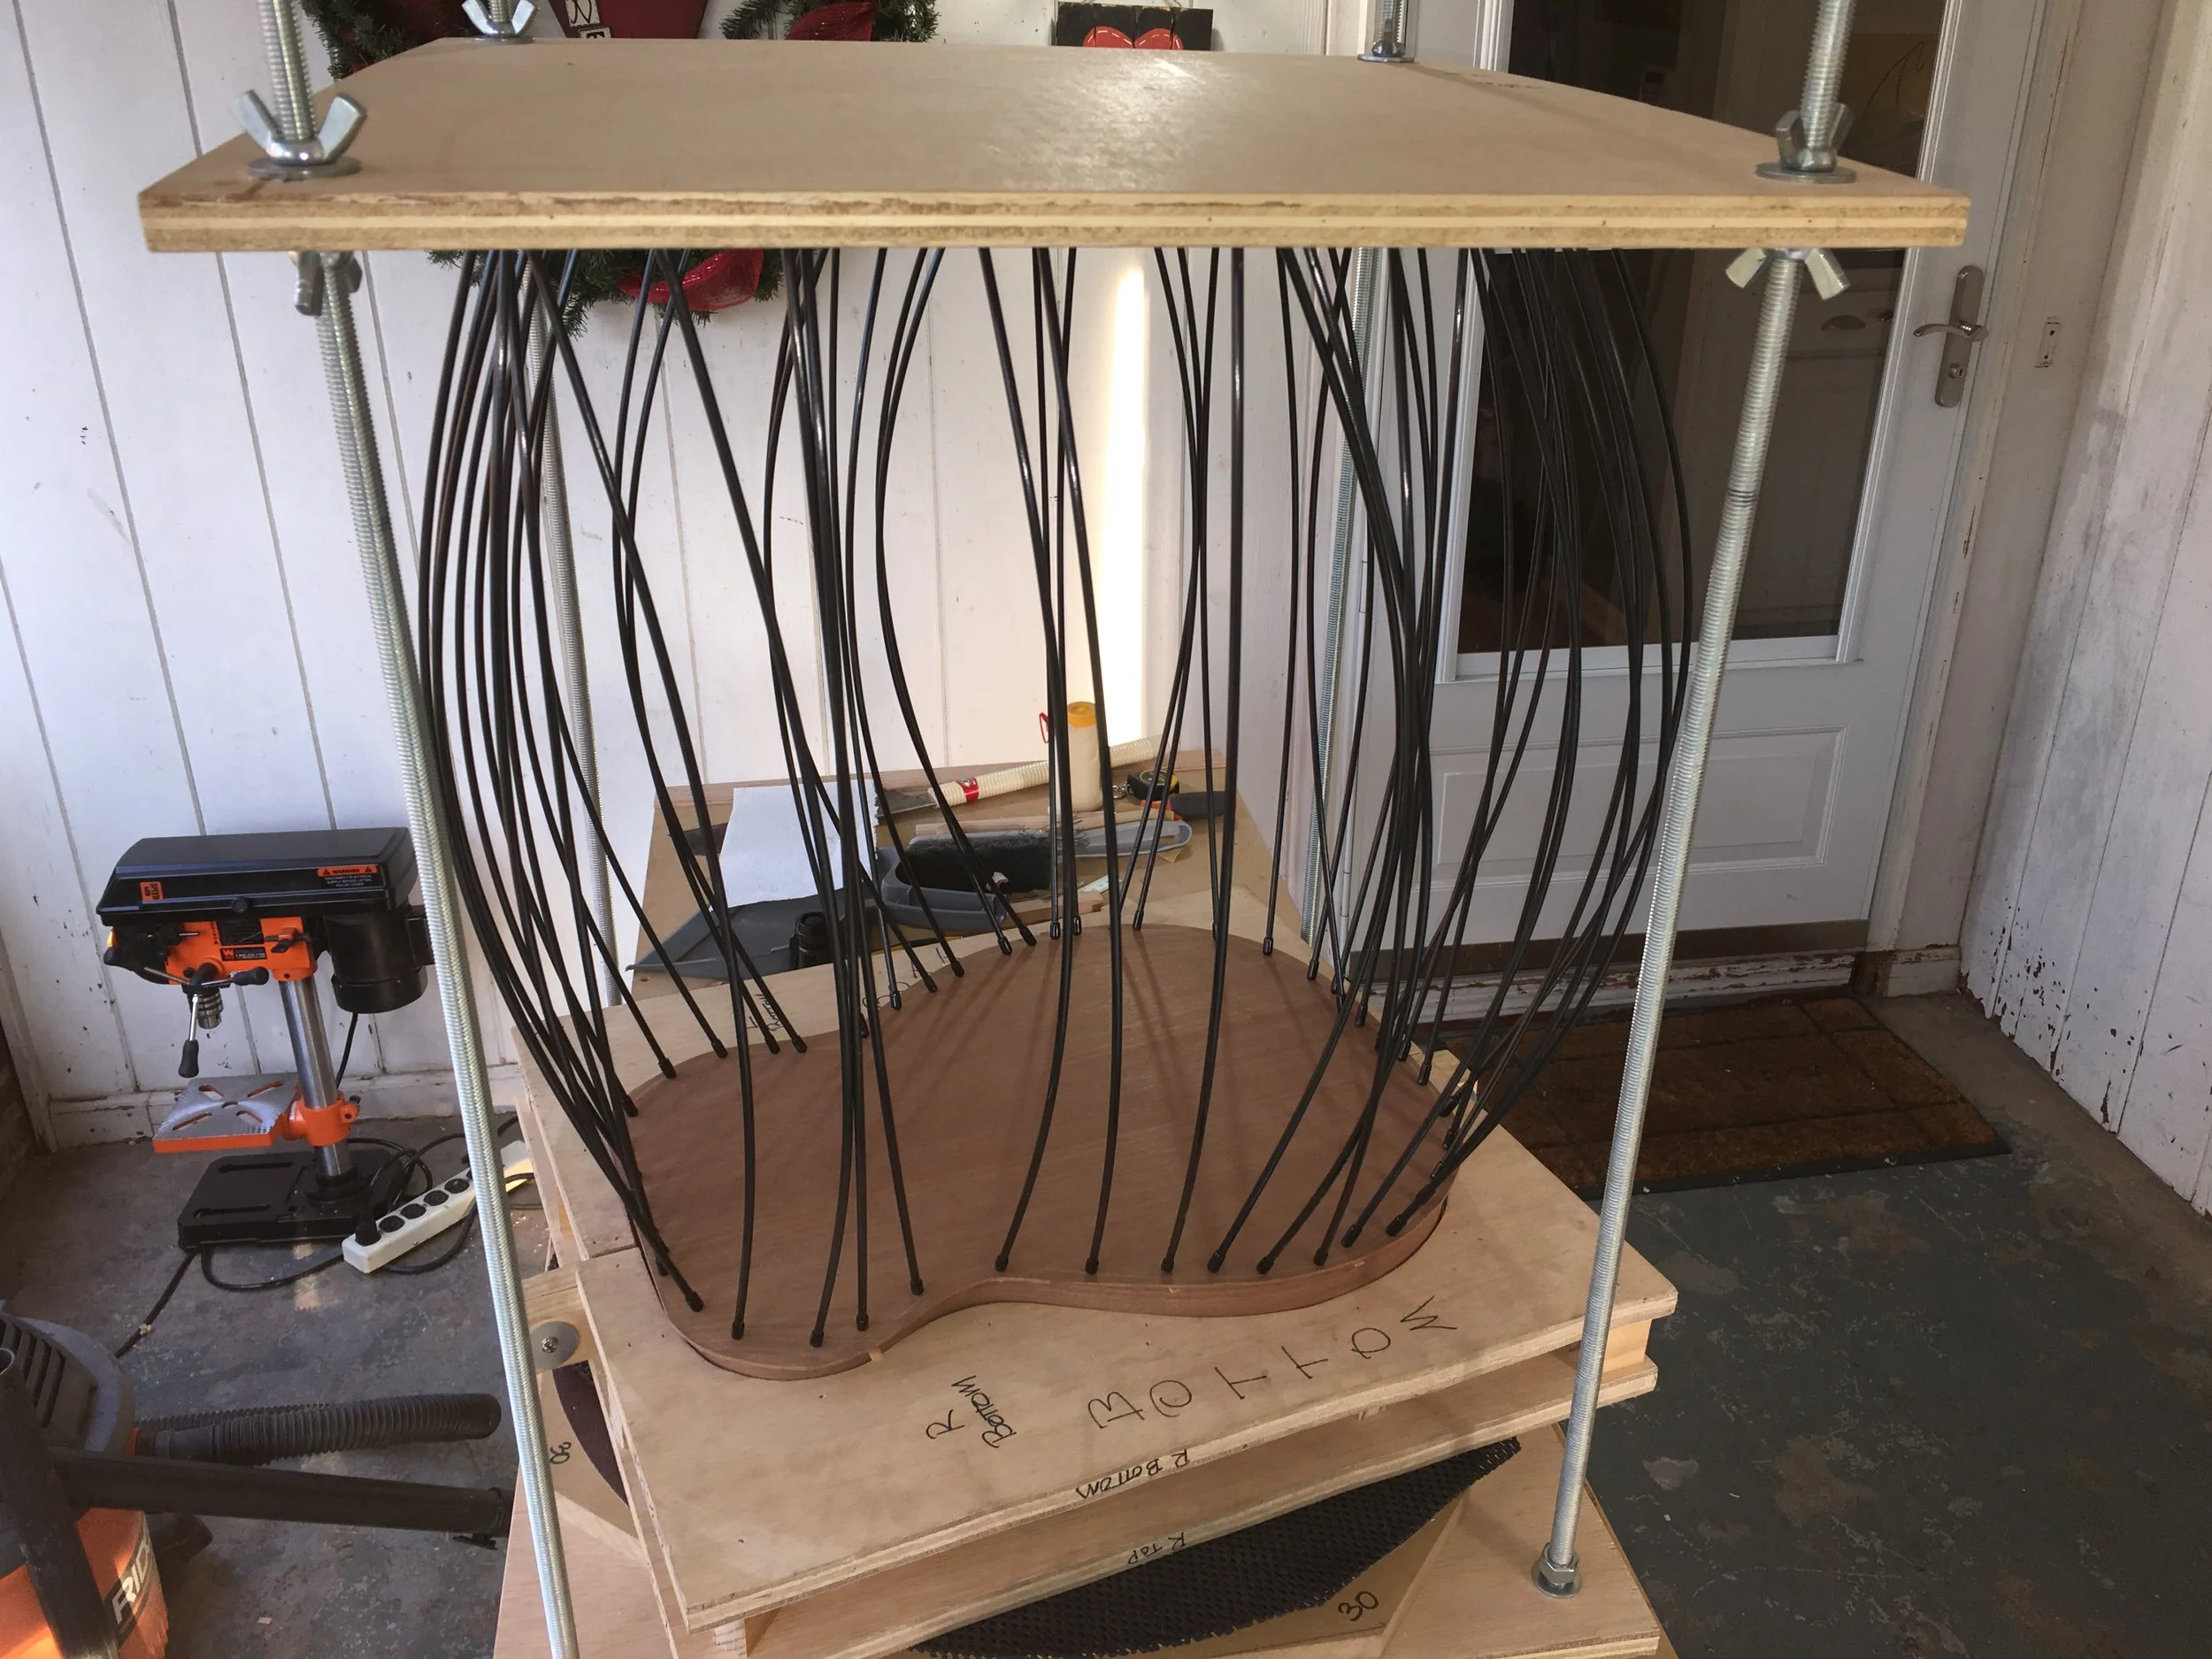
IMG_1501
As I am working on my carport, I have had several neighbors walk by and see my frankensteinesque contraption and come up to ask me what I am doing. This project has been a great way to meet people in our neighborhood!
Once I took it all out of the deck, part of the back popped up as it did not have a good glue connection. I just re-glued this section and clamped it up good with some clamps:

IMG_1503
Finally, I used the chisel to trim off the excess material from the back and square it all up with a little sanding:

trimming IMG_1516
So far everything is holding together. Time to finish up the top, fit it, and close the box.

top gluing IMG_1514