#1-The Bindings
The Bindings | The bindings fit around the top and back of the guitar to both protect the edges and to add beauty to the form. Cutting the binding channels, especially in the soft cedar top of the guitar, has been one of the steps that I have dreaded and feared. In the end, everything came out OK, I learned a lot and there is a LOT of room for improvement.
I decided to use Rosewood for the binding of the guitar. I was working hard and not thinking about documenting some of these steps and so I forgot to take pictures of the process of bending the binding strips using the bending iron to fit the shape of the guitar.
The next step was to cut the binding channel in the top and back of the guitar to receive the rosewood strips. There are many ways to do this. One method is to use a router with a special jig or dedicated binding cutting station. Since those options cost between $200 - $450, I decided to do it the old fashion way by hand.
One of the specialty tools that I knew I wanted to spend some money on is a tool called a Gramil.

gramil IMG_1521
The Gramil foolishly laid on the top of the guitar to cause more dents and scratches.
This little tool scores the wood which will then be chiseled out and filed flat to make a small (2.5mm by 5mm) channel around the guitar. This score line makes it easy to keep a consistent channel depth and also to make chiseling out the excess a little easier.

gramil IMG_1520
You can see the thin line scored into the top of the guitar.
I made a LOT of mistakes in this process. 1) I did this mostly at night on the carport without adequate lighting, 2) I was working tired, and 3) I did not pay attention to the grain direction and blew out the grain in several places. I have known about grain direction but working with these sensitive woods and tiny specs has given me a whole new appreciation for being careful to follow the grain of the wood. In this step, it is critical to work "OUT" of the grain in order to prevent tear out:

grain-working
Once I had finished the channels I realized that I could have scored the channels with the Gramil, then routed them out with my Dremel tool with a depth stop jig and got MUCH better results. I had a lot of clean up and filling to do on this one. Now I know what I will do on Number 2 to get a better result.

binding 02 IMG_1528

binding 02 IMG_1526
Once the channels were cut, I put a thin layer of shellac around the edges to seal up the end grain. I decided to glue the bindings in place using thin viscosity CA glue (super glue) and sometimes that can wick into the grain and stain the top. Although on this guitar it probably wouldn't matter. I have already beat up the top pretty good by not being careful. While I was chiseling the binding channels my chisel slipped and made an enormous gouge in the top:
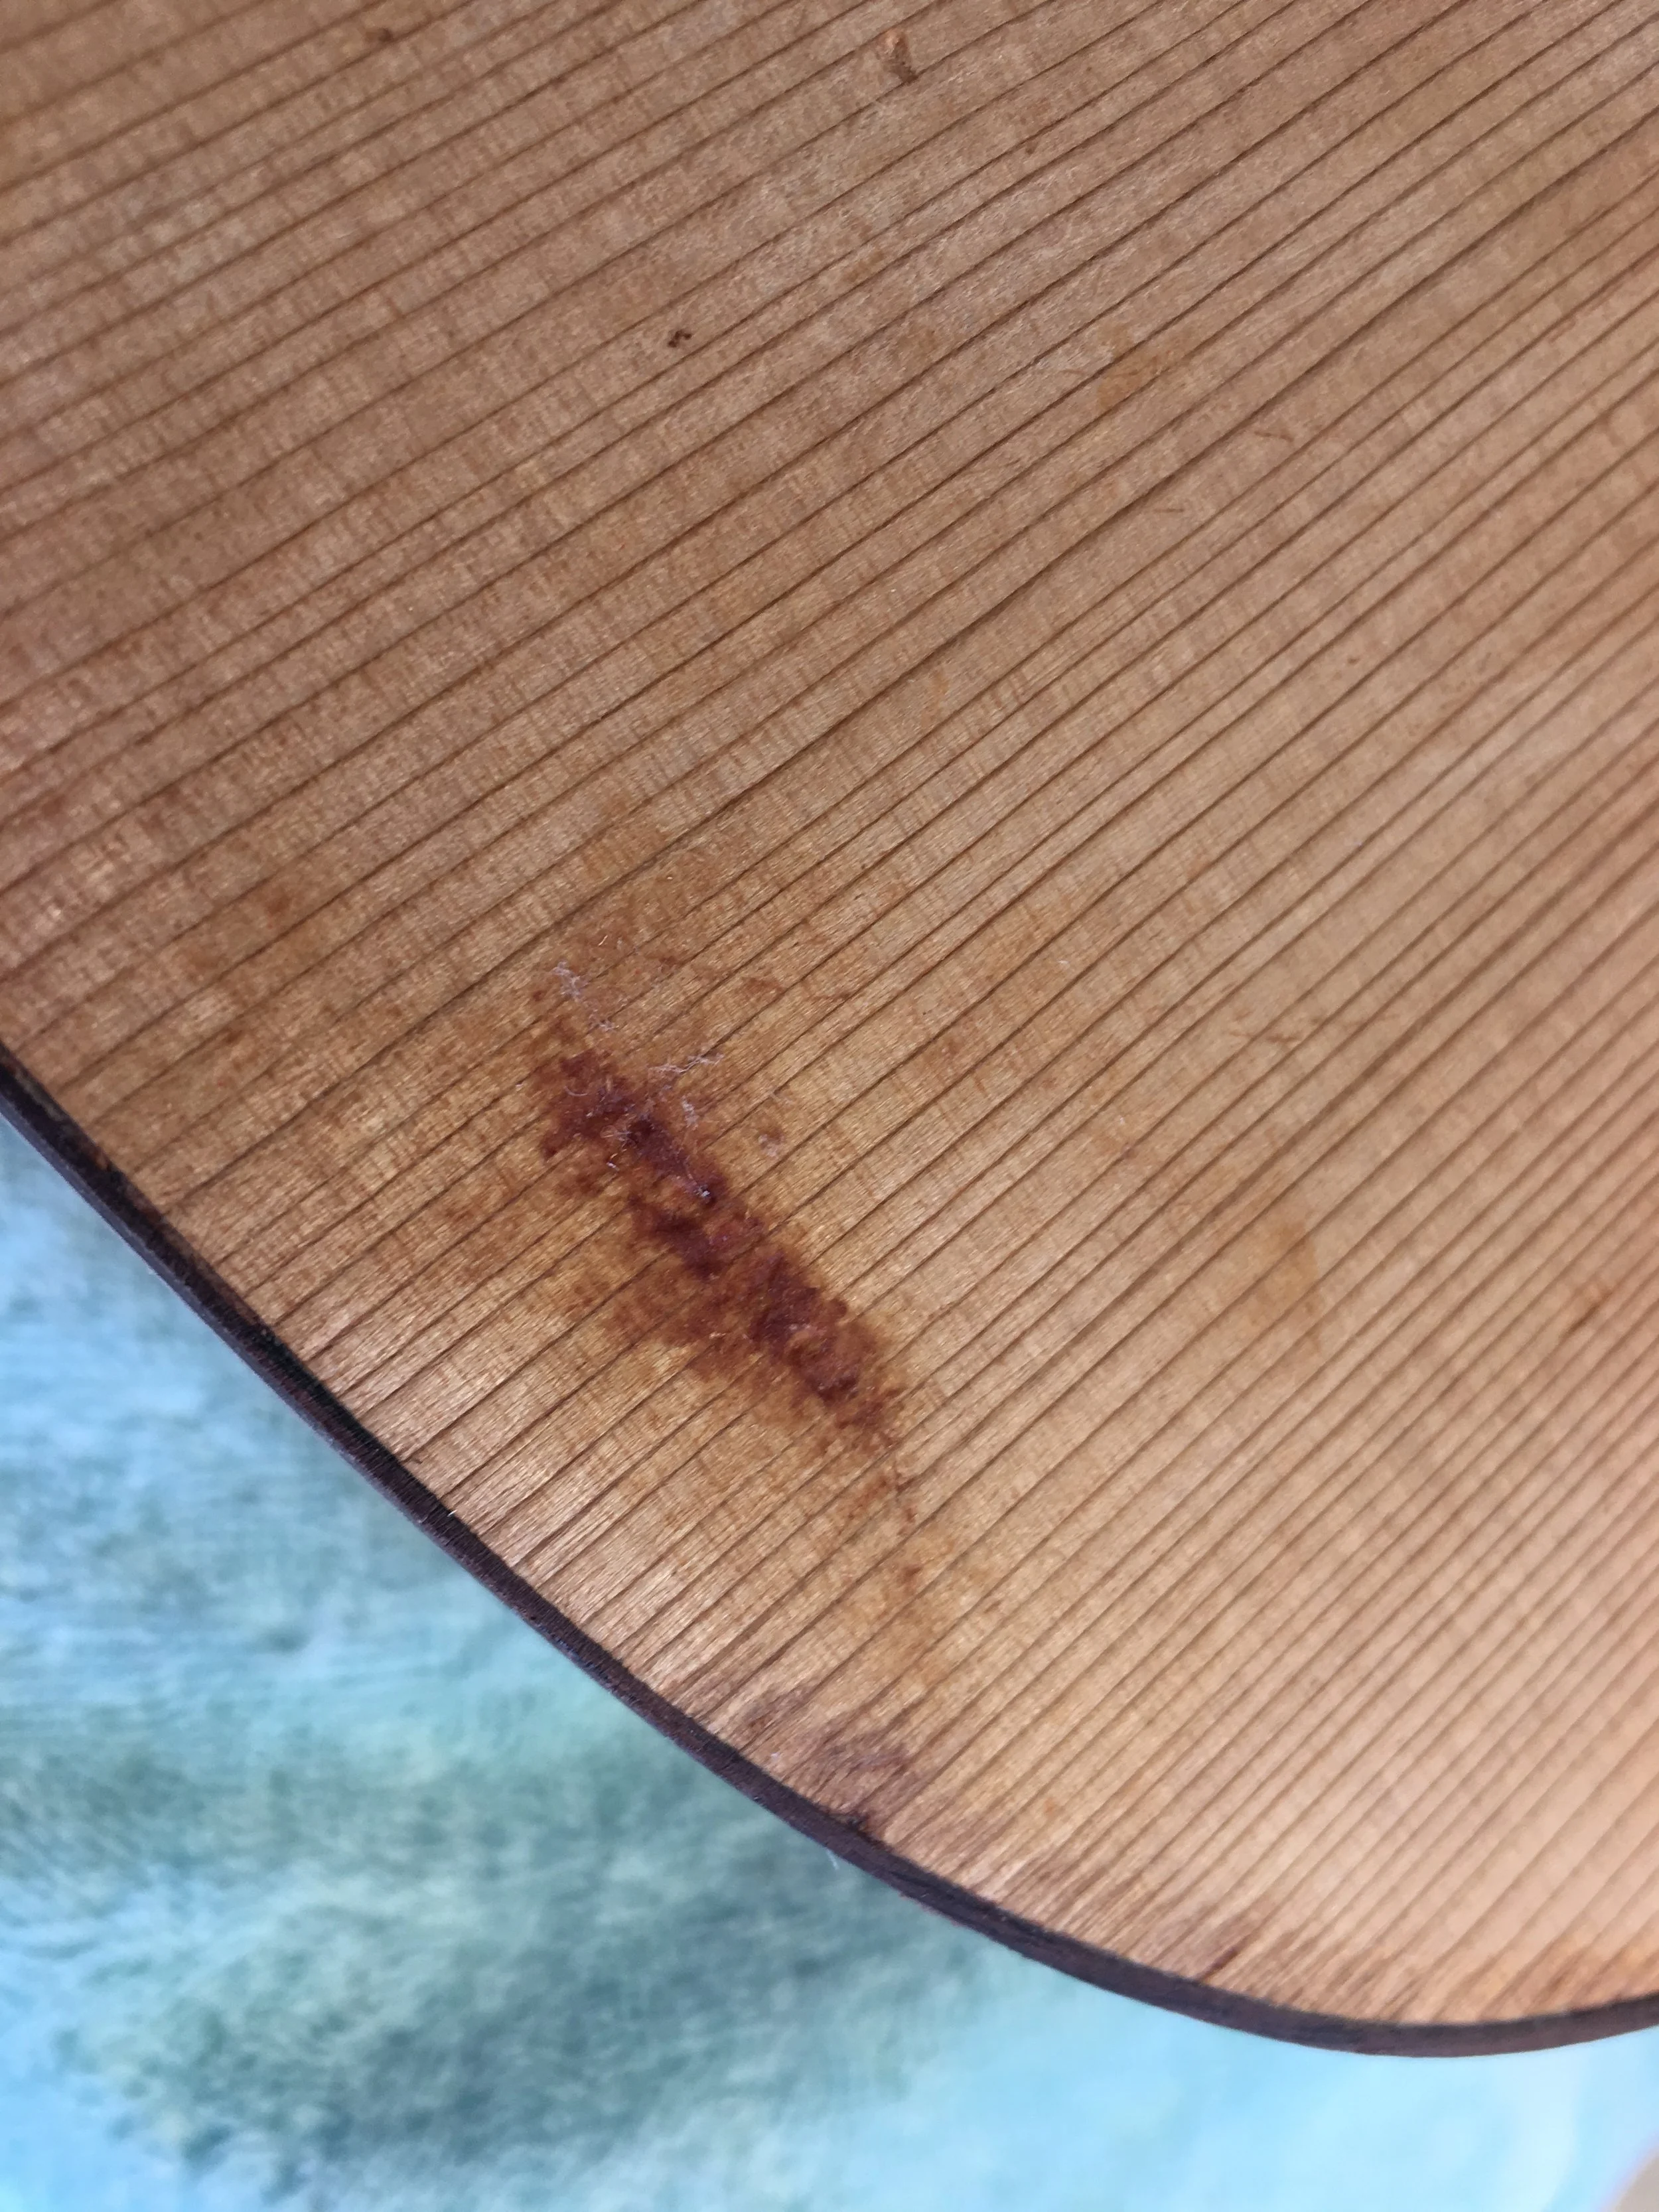
problems IMG_1537
The gouge is filled with superglue and I will deal with it later.
I placed the bindings in the channels and taped them in place with some 3m 233 masking tape. This tape is like a painters tape but with more stretch.

binding 02 IMG_1529
Now I just applied the CA glue between the cracks and let it wick in between the bindings and the top and back. Once that was dried I removed the tape and began scraping the excess glue.

problems IMG_1533